

TCMS - Installation on VMware vSphere
This how-to guide describes how to install TCMS on an ESXi server from an ISO file.
Installing a TCMS is no different from installing other operating systems and can be done using either the local client or the vSphere Web Client.
Step 1 – Download the latest TCMS installation image
You can obtain the download link and login credentials from Rangee Support upon request.
Step 2 - Make the image accessible
Save the installation image either to a datastore or to your local hard drive.
Step 3 – Connect to the ESXi or vCenter Server
Step 4 – Open the dialog box for creating a new virtual machine
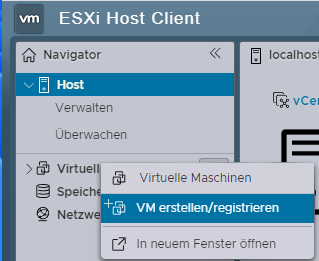
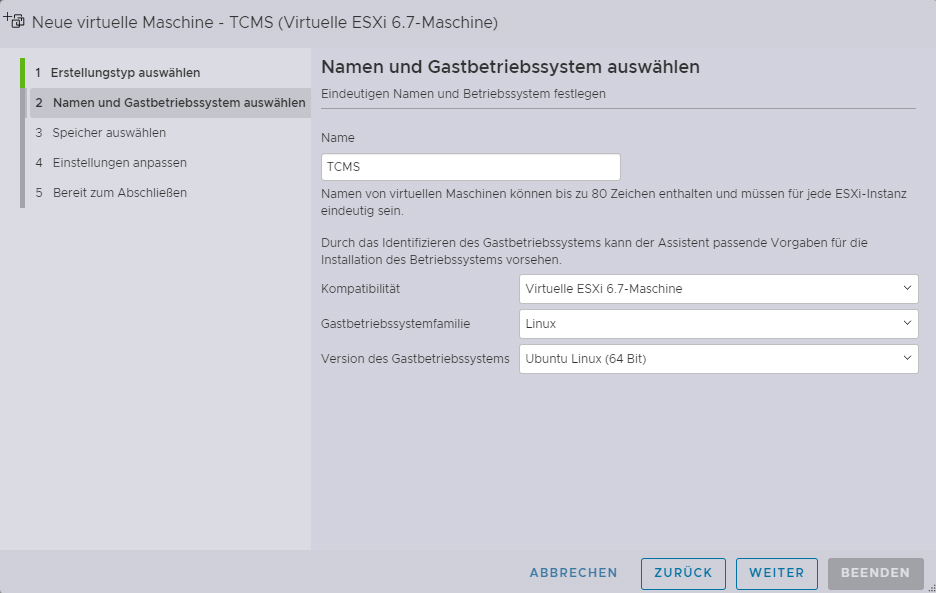
Step 5 – Virtual Machine Settings
Select the following settings:
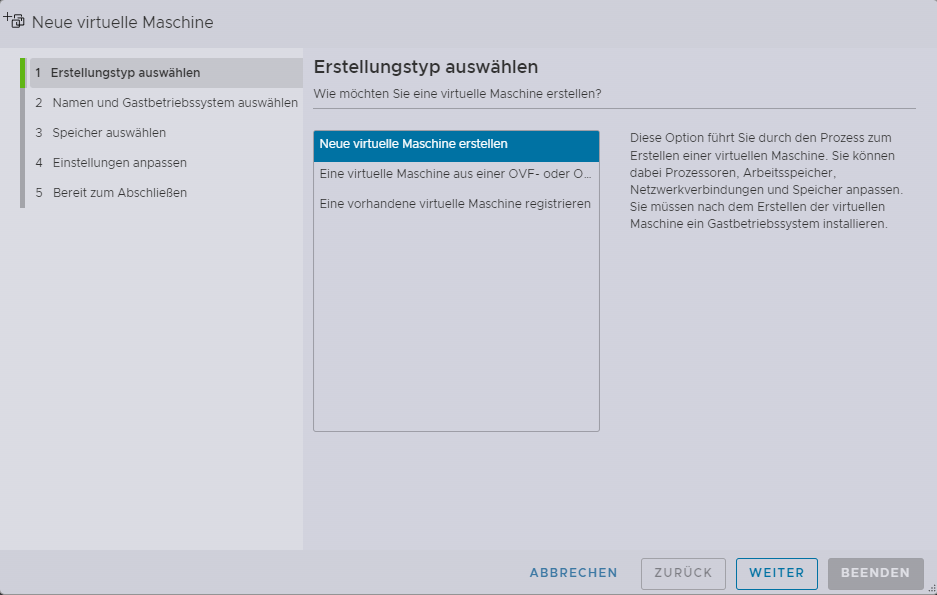
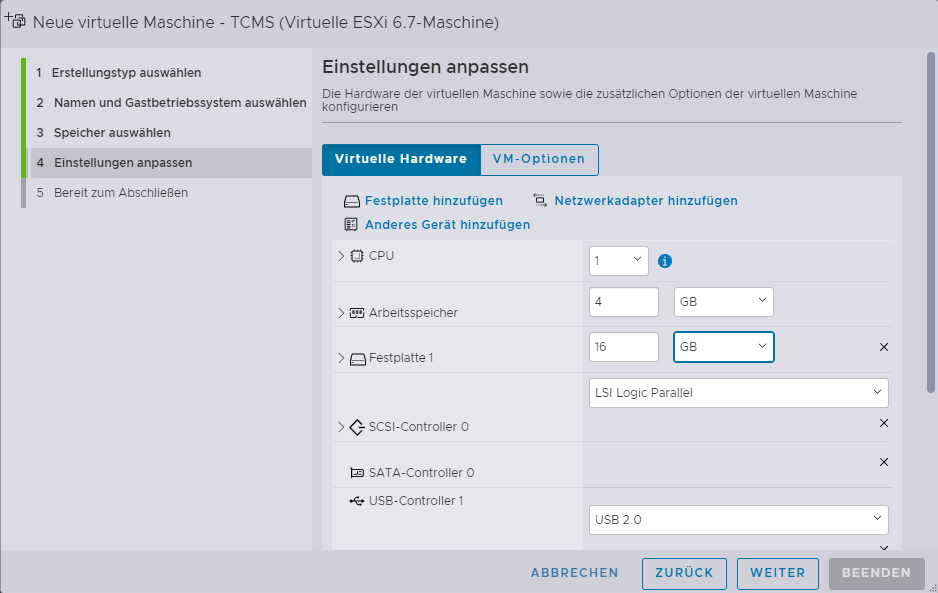
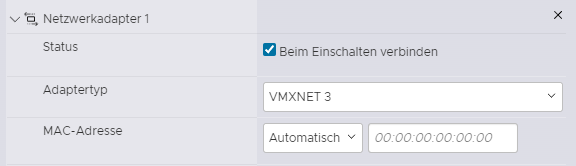
For the network adapter, select VMXNET3 or E1000.
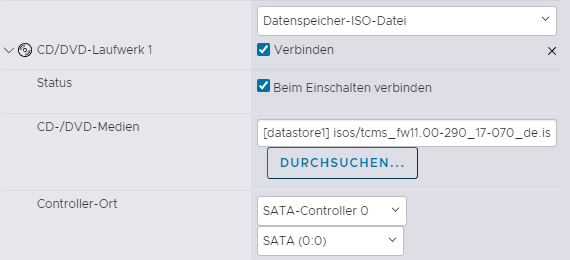
Under “CD/DVD Media,” select your TCMS ISO file and choose “Connect on Startup.”
| CATEGORY | SETTINGS |
| CONFIGURATION | Typical |
| NAME AND LOCATION | Optional |
HOST / CLUSTER | Optional |
RAM | at least 4 GB |
OPERATING SYSTEM | Linux: Firmware 8.04: Ubuntu 32 bit Firmware 10.00+ : Ubuntu 64 bit |
NETWORK | Network: |
HARDDRIVE | at least. 16GB (32 GB recommended) |
Step 6—Open the virtual machine console
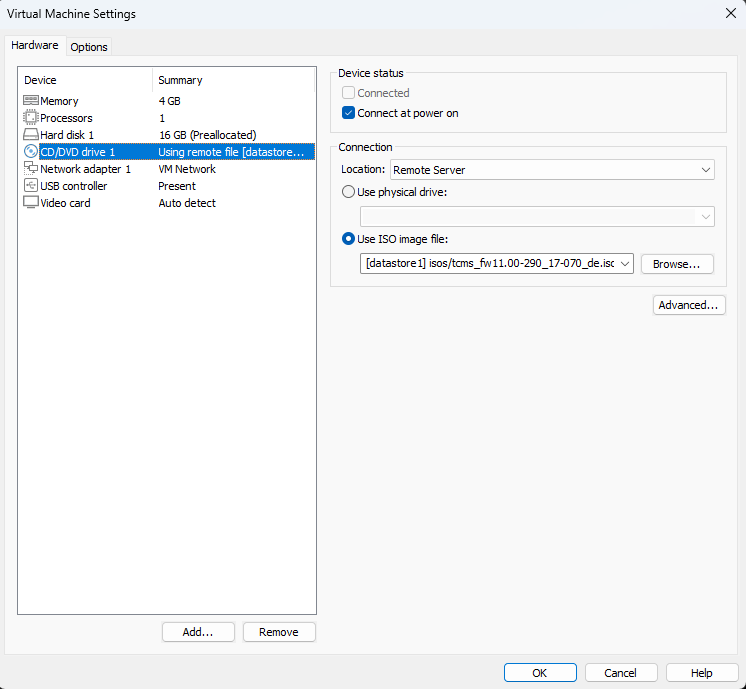
If you have stored the installation image on a datastore, select “Remote Server” under Location and choose the ISO file on your datastore.
If you have saved the image on your local computer, select “Local Client” under Location and choose the ISO file on your computer:
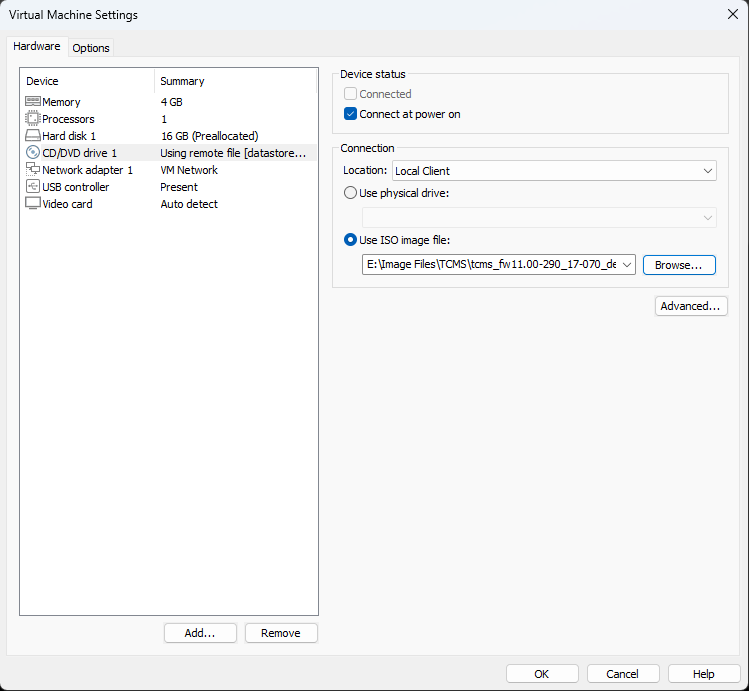
Also, enable the “Connect at startup” setting.
Step 7 – Installation
Follow the rest of the installation process as described in TCMS - Installation - Step 3.