Installation of Windows 10 IOT LTSC 2019
This how-to describes the different options for deploying a Windows 10 IoT image to a client device.
1. Create Installation USB-Flash
Prerequisites:
You need
- USB-Stick (min. 500 MB)
- Windows 10 desktop or Windows 11 desktop
The files:
- Windows Flasher - Recovery Media Creation Tool
- Windows IoT Image which fits to your device: „devicename_b###.wim“ (WIM file)
The files can be downloaded from Rangee Updateserver. If you do not have the Updateserver Access, please contact Support by E-mail: support@rangee.com
1. Create a Recovery USB Flash
Plug the USB Flash to your windows desktop
Execute the Windows Flasher - Recovery Media Creation Tool on a standard windows desktop. (Run as administrator)
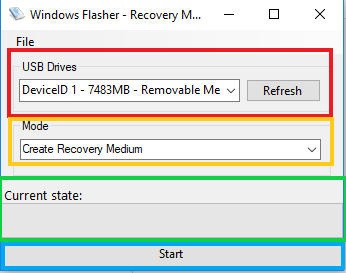
In USB-Drives (red box) select your USB flash (If it's not displayed, please click „Refresh“)
Choose a „Mode“ (yellow box)
Create Recovery Medium with 2nd data partition (recommended)
Start creates a bootable USB Flash with the Rangee Recovery Console
You can see the progress at „Current state“(green box)
After the proces has finished, copy the Windows-Image (WIM file) to the Image directory
Option (NOT recommended)
- Create Recovery Medium:
- Start creates a bootable USB Flash with the Rangee Recovery Console
- The Windows-Image (WIM file) must be stored on a second USB-flash or network drive
2. Execute Rangee Recovery Console
Recovery option on Windows 10 IoT thin client
If you want to deploy the image with an USB-Stick, it has to be NTFS formatted and at least 8GB capacity.
- Download the Windows 10 IoT image which fits to your device: „devicename_b###.wim“ (approx. 6GB)
- Copy the image on a USB-Stick or a network drive
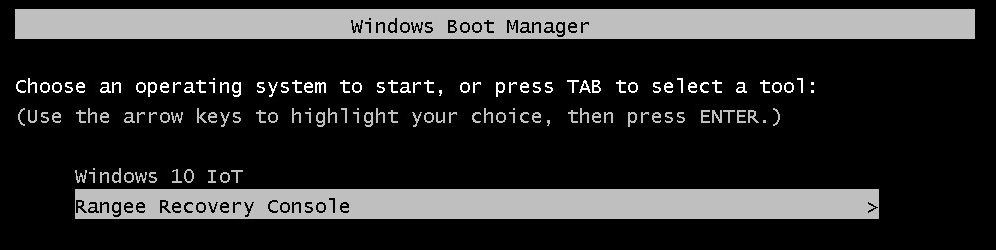
- Start the device and push the „Arrow down key“ until the windows bootloader appear:
- Choose „Rangee Recovery Console“
- Wait until the „Rangee Recovery Console“ is loaded and continue with „Rangee Recovery Console“ .
Recovery option from Installation USB Flash
Plug the USb flash to your thin client. The thin client should have at least 4 GB RAM and 120 GB Flash.
Boot the device from USB Flash
2.1 Install new IOT Image
The Rangee Recovery tool will boot a windows Desktop with some applications:
| Command Promt: Notepad: Reboot: Regedit: Shutdown: Task-Manager: Windows Flasher: |
|---|

Start Windows Flasher
At the first start you'll see the following
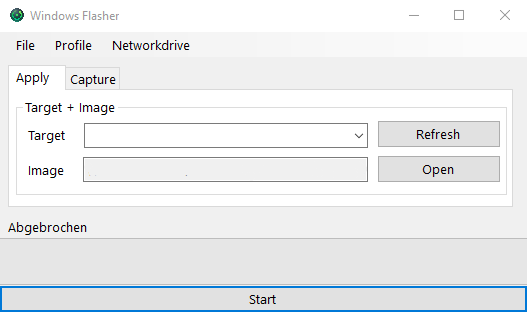
Choose the WIM file
If the WIM file is stored on Installation USB flash please choose the WIM file fom Image directory.
If you store the image on a second USB-flash, plug in the USb Flash and select the right device/path.
If you store the image on a network drive, use „Networkdrive" -> Connect Drive“:
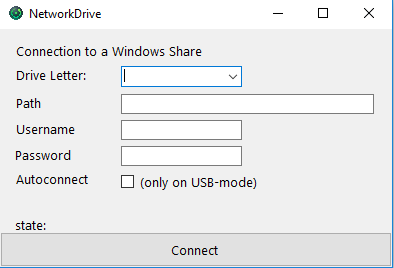
- Choose a drive letter
- Put in the complete UNC path to the share
- If nessecary put in the username and password
- The hook „Autoconnect“ persists the networkshare and autoconnect it on the next boot from this USB-Stick.
- You can finally connect the drive by clicking "Connect"
The installation
Use the following attributes:
| Parameter | Wert | Bedeutung |
| Target | # Disk ##GB | Choose the target drive |
| Image | #devicename_b###.wim“# | Choose the downloaded WIM file |
| Start | Start the installation |
2.2 Capturing a Windows image
You can capture an Image by using the „Capture“ function. This captured images can be deployed on other devices. Please run "sysprep" before capturing an image.
(https://docs.microsoft.com/en-us/windows-hardware/manufacture/desktop/sysprep--generalize--a-windows-installation)
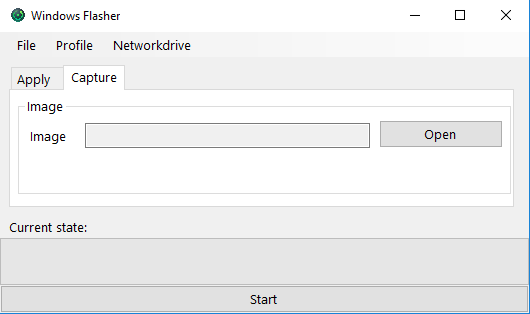
| Parameter | Wert | Bedeutung |
| Image | X:\path\Name.wim | Insert the path in which the captured image should be saved |
Logging
The Log can be views by clicking „File -> Open last Log File“