General - Connecting to a RDP RemoteApp
Server Environment
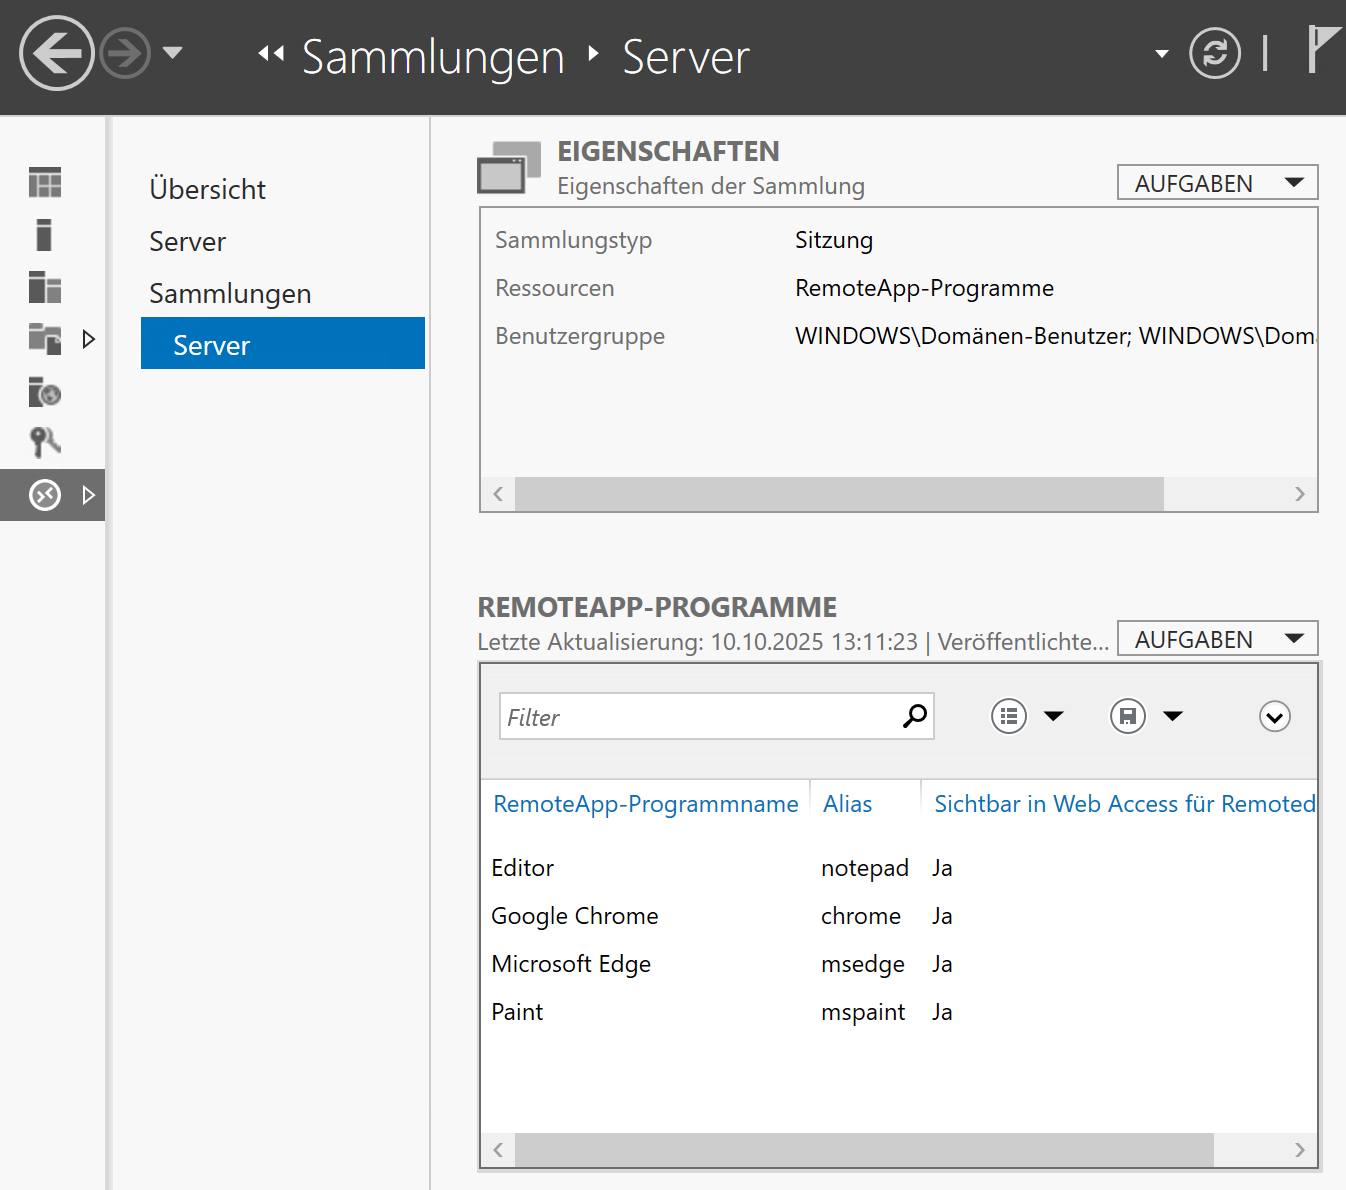
This article was tested with a Windows Server 2022 system configured with various applications shared via RemoteApp.
Thincast / FreeRDP Configuration
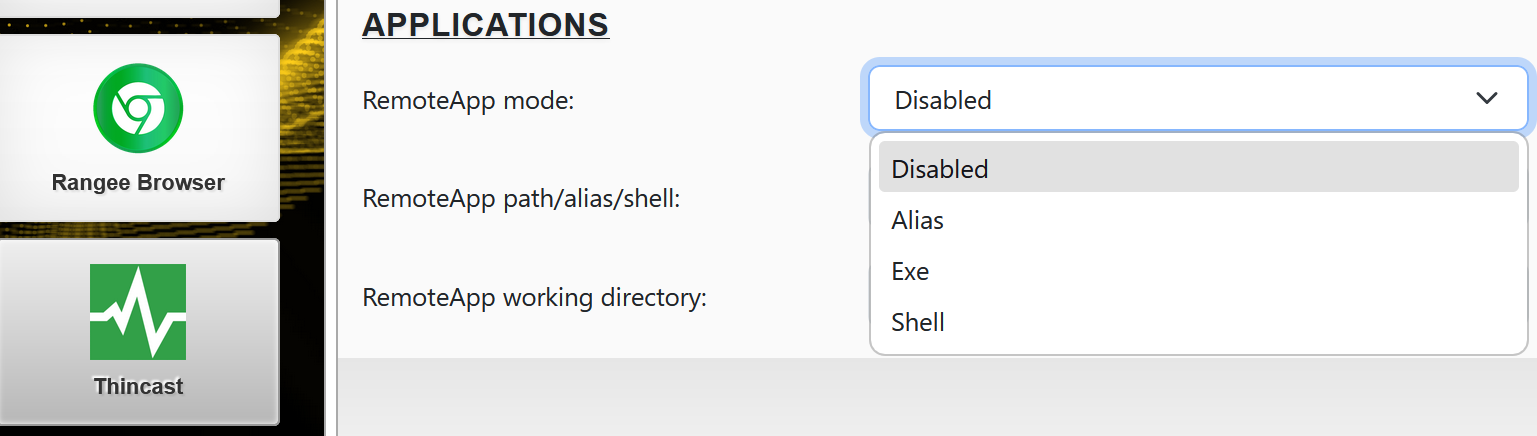
In each connection configuration, you have three options for launching a RemoteApp.
For all three options, the corresponding application must first be published on the server for RemoteApp access.
All other connection parameters can be configured as for a standard RDP connection.
Alias Mode
In “Alias” mode, enter the alias name of the published application in the “RemoteApp Path/Alias/Shell” field according to the server configuration.
The client will then connect to the application in seamless mode.
Exe Mode
In “Exe” mode, enter the application to be launched in the “RemoteApp Path/Alias/Shell” field.
If required, you can also specify the full path.
The client will start the application in seamless mode.
Example entries for Exe mode:
- %ProgramFiles%\Windows NT\Accessories\wordpad.exe
- notepad.exe
- %ProgramFiles(x86)%\Microsoft\Edge\Application\msedge.exe
The result after connection setup is identical to that of Alias mode.
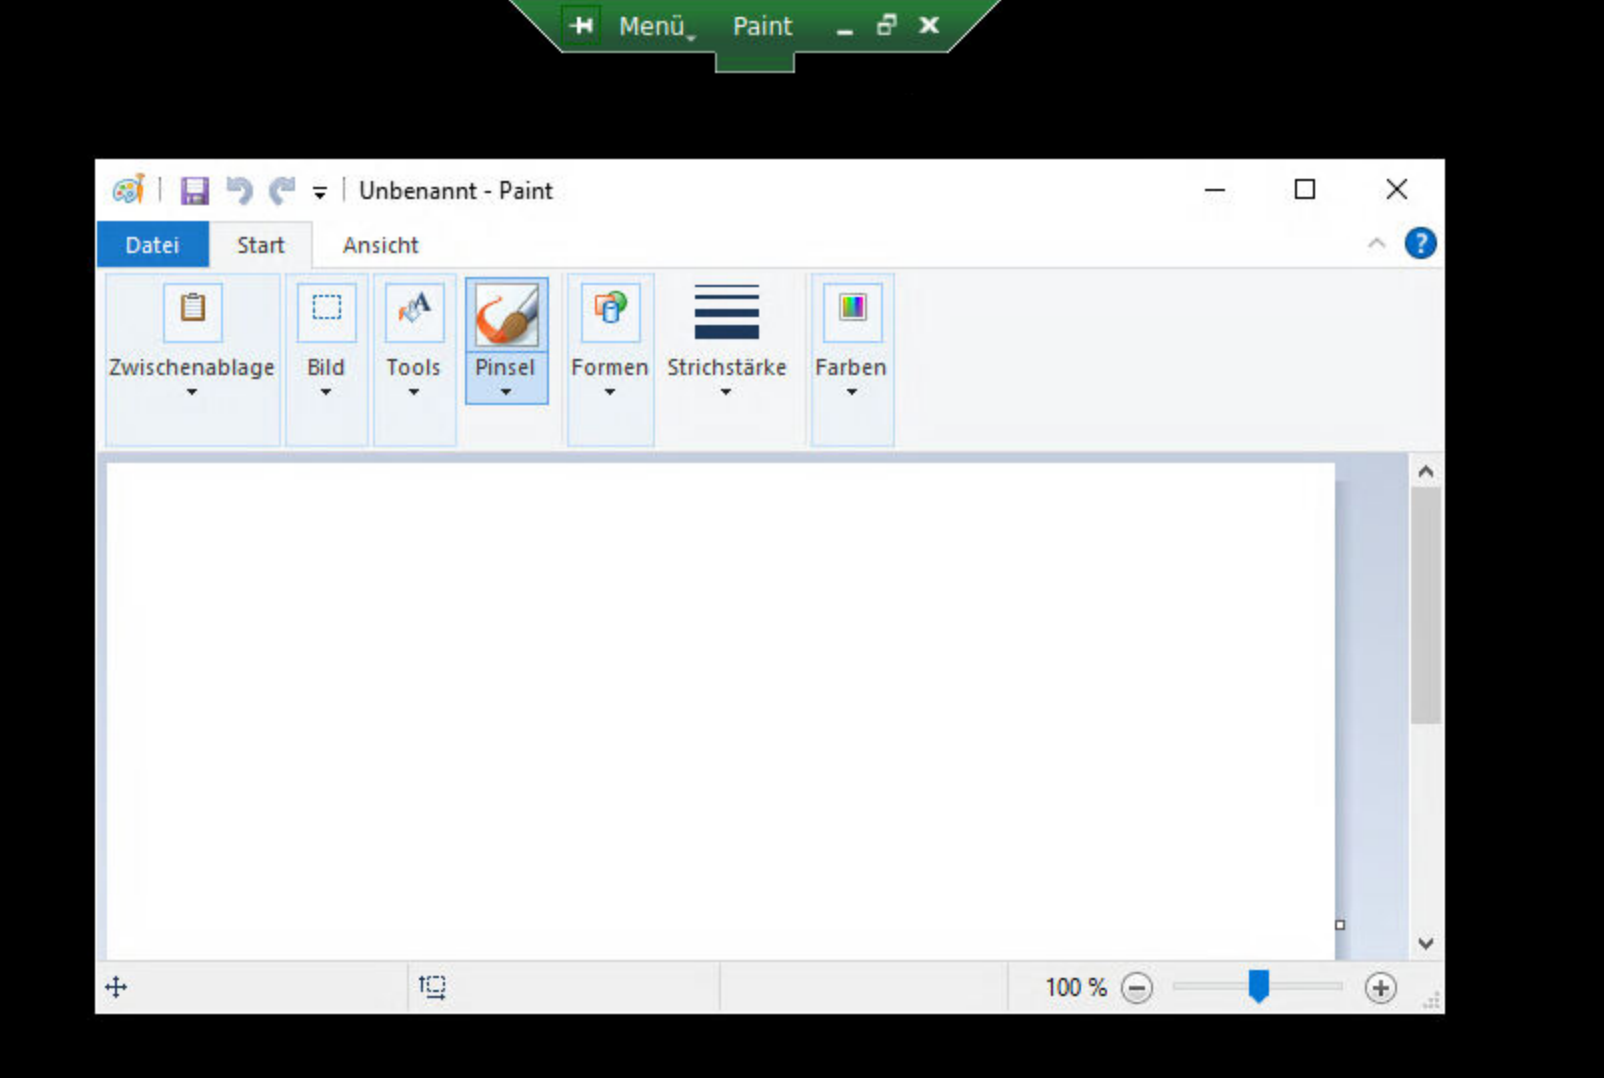
Shell Mode
In “Shell” mode, the published application is started in its own session against a black background.
Instead of the Windows Explorer, only the defined application is executed within the session.
The application path can be defined in two ways:
- By specifying the full path (as in “Exe” mode), or
2. By using the alias name prefixed with “||”
Example entries for Shell mode:
- %ProgramFiles%\Windows NT\Accessories\wordpad.exe
- notepad.exe
- %ProgramFiles(x86)%\Microsoft\Edge\Application\msedge.exe
- ||mspaint
- ||msedge
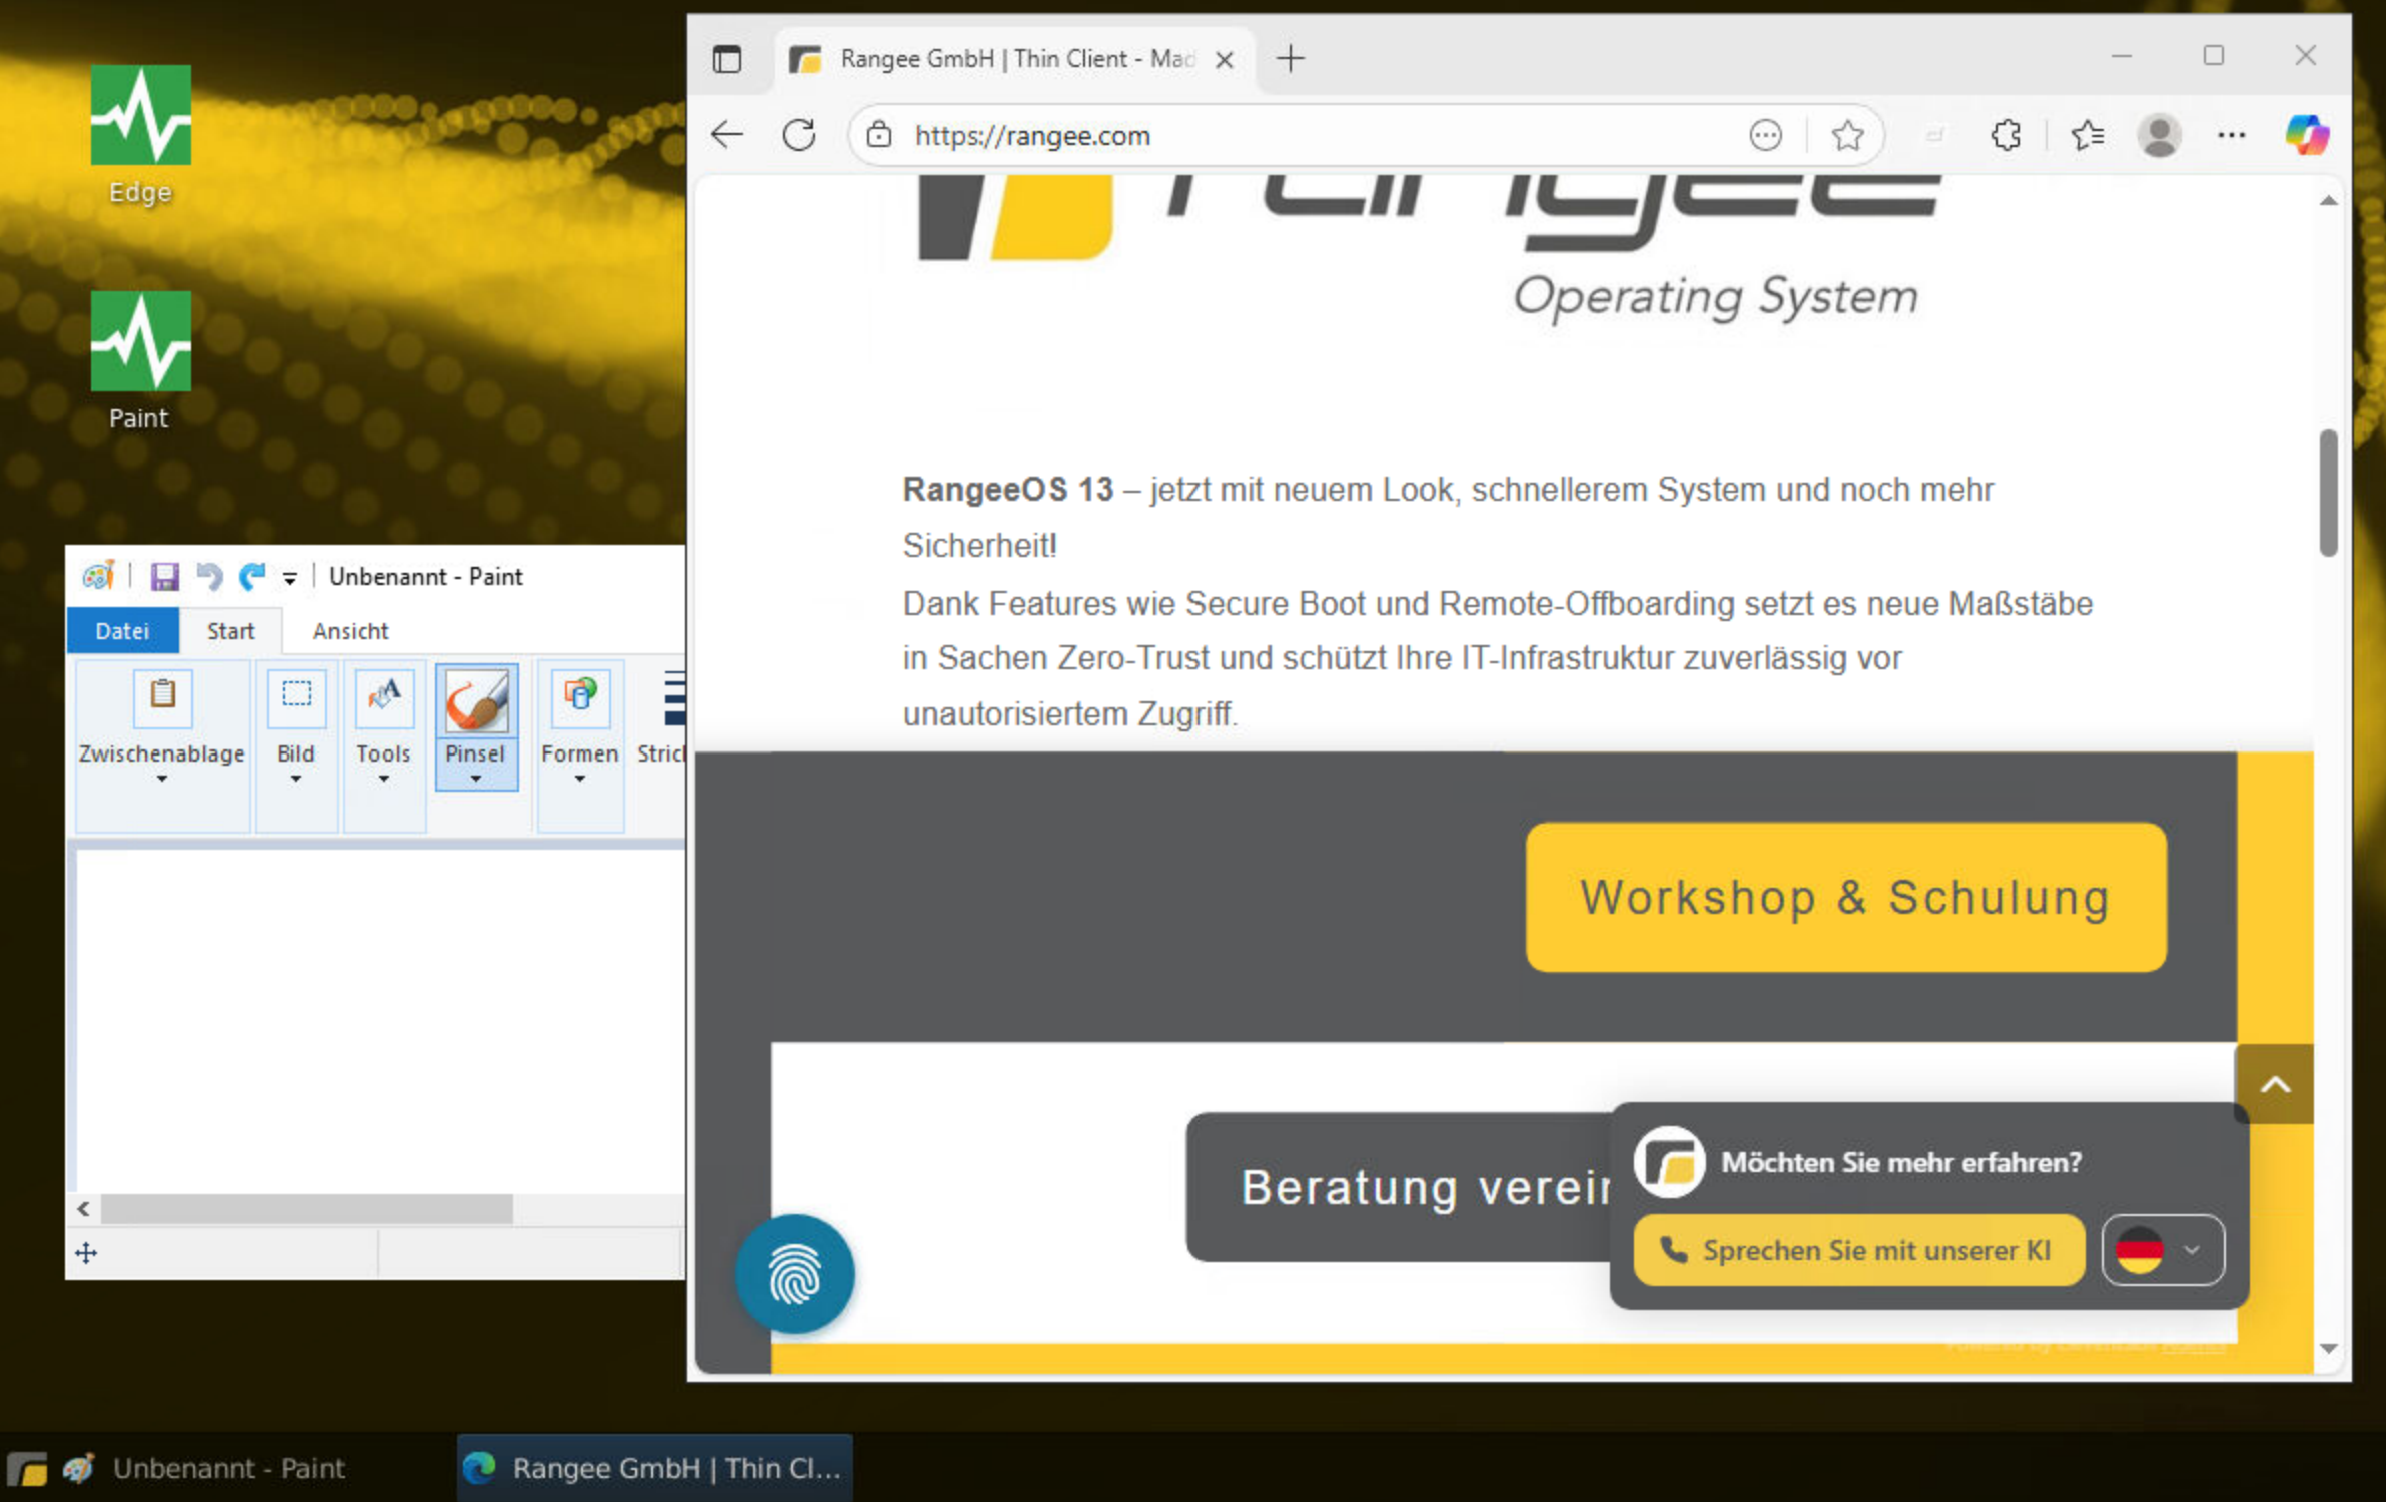
Black Borders / Transparency in Seamless Mode
When running a session in “Exe” or “Alias” mode in seamless mode, black borders may appear around the published applications.
This occurs because RangeeOS runs without a compositor by default.
A compositor is required to correctly render transparency effects, such as window shadows.

To enable a compositor, go to Desktop → Compositor and set the option to “XFWM”.
The compositor will start immediately after applying the change, and the black borders will disappear.